Este post também está disponível em:
![]() Português
Português ![]() English
English

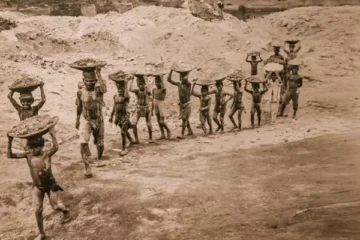
The main attraction of Tracunhaém is the transformation of clay into utilitarian and decorative pieces, thus being the main source of income and employment in the region.
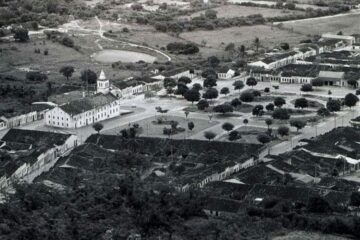
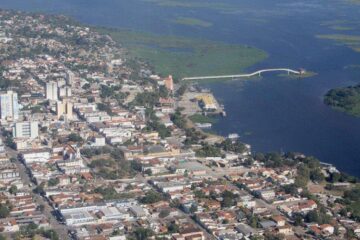
The city of Tracunhaém is located 55 km from Recife.
The municipality has a name of indigenous origin, meaning “pot of ants”, and stands out for the production of saints, animals and utilitarian pieces, using clay as raw material.
The municipality of Tracunhaém, located in the Zona da Mata de Pernambuco, received the title of “Capital of Ceramic Crafts”, by the Legislative Assembly of Pernambuco.
The place is one of the most important ceramic centres in the state.
Watch the video “Tracunhaém is the Capital of Handicrafts”
Tracunhaém the city of clay handicrafts
Practically 50% of the population survive, directly or indirectly, from the transformation of clay into utilitarian pieces or works of art.
They are the anonymous workers who work in the potteries of the Municipality or the various famous artisans of the city, some of them known even outside Brazil.
In his justification he states that “thanks to the entrepreneurial vision and the boldness of the artisans, Tracunhaém is known in the state of Pernambuco as the tourist city of clay crafts, whose artists, using their knowledge and vocation, transform clay into extraordinary works”.

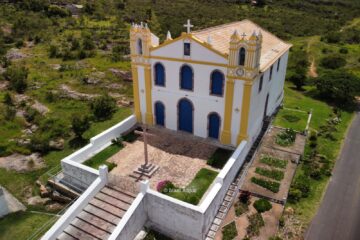
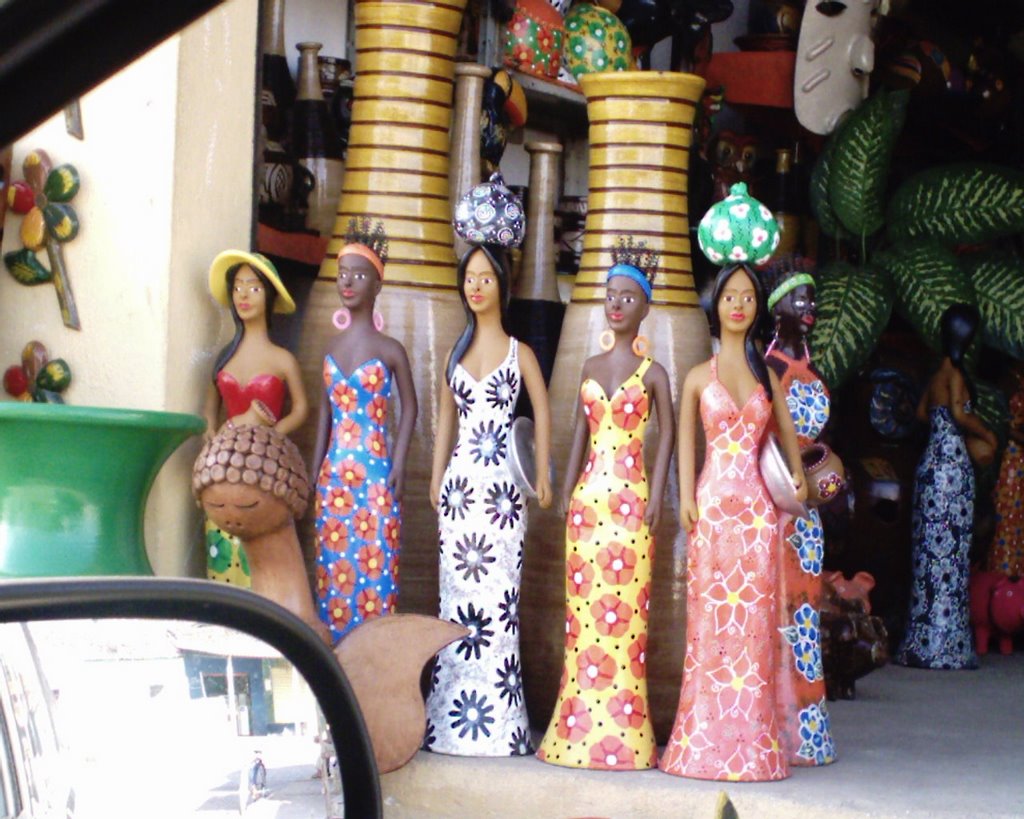
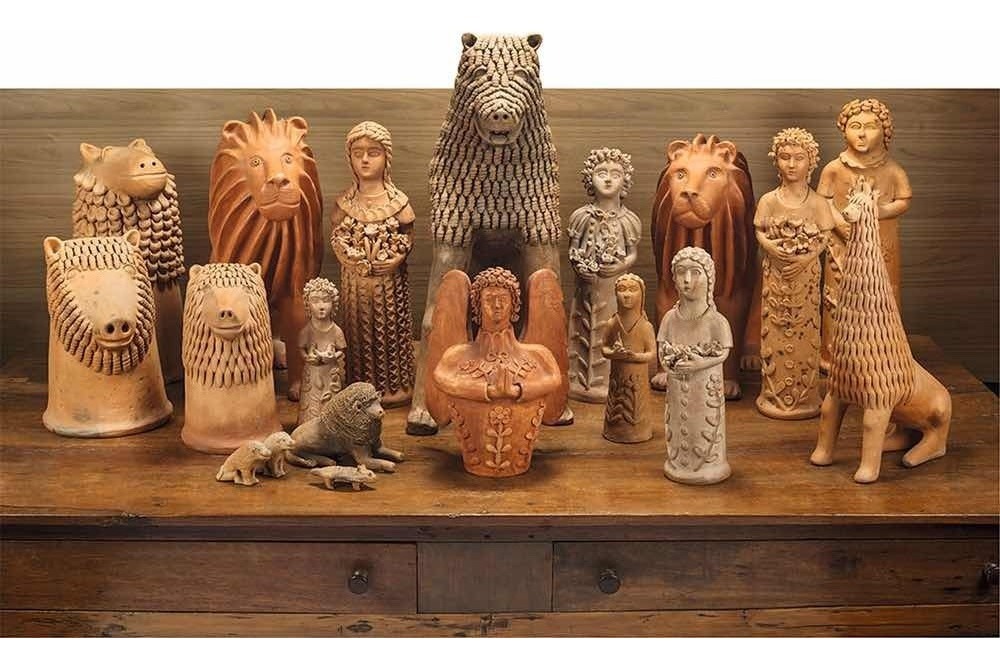
In addition to utilitarian ceramics, which date back to the colonial period, Tracunhaém stands out for its figurative and decorative clay art, creating saints, angels, animals such as the famous lion with curls and human figures.
The clay figures are inspired by images from everyday life, from popular culture and, above all, from religious faith.
Tracunhaém has become such an artistic centre that some of its artisans have adopted the town’s name as their surname, and are identified only in this way. Many artists are the children or “grandchildren” of potters.
They are people who learnt how to model clay when they were still children, starting the production of figurative ceramics, which later became a point of reference, both for the city and for Brazilian popular art”.
The artists of Tracunhaém use clay as the main raw material for making utilitarian and decorative ceramics. The saints produced by local artisans are nationally famous.
In the 1970s and 1980s, the town was a must-visit for Brazilian intellectuals and artists travelling through the state of Pernambuco.
When he was in Recife in 1980, Pope John Paul II took an image of Our Lady of Mount Carmel produced in Tracunhaém.
For the deputy “the title of “Capital of Ceramic Crafts” is deserved due to the activity in the field of ceramics that is predominant in the municipality of Tracunhaém, whose production has its own style that ensures the aesthetic recognition of the pieces produced in the locality “.
The parlamenta also points out that on the other hand, the tribute seeks to value and honour the artisan artist who with his beautiful art is part of the history and construction of the city.
Craftsmanship of Clay
The art of clay is an ancient activity existing more than 3,000 years before Christ.

In Brazil it is a very representative practice for popular culture.
It is a legacy left by the Indians. The Indians made clay toys for their children and household objects such as troughs, bowls, bowls, pots and modelled them according to their creativity and / or need, and painted with strong and colourful paints, inspired by nature.
Clay handicrafts are a spontaneous production that starts from the sensitivity and ingenuity of the artisan.
The matuto is cunning and has a fertile imagination to create. He uses clay to make something that gives him pleasure, beauty and art, making handicrafts a source of income for his subsistence.
Clay artisans are anonymous artists scattered throughout the hinterlands of the North and Northeast of Brazil. In many municipalities in the north-east of Brazil, and in particular in Pernambuco, clay craftsmanship is widespread, manufactured in a rustic way in Caruaru, Tracunhahém and Goiana, which are the cities that stand out in the production of utilitarian and ornamental ceramics in the state.
In Caruaru, the practice of clay crafts originated in Alto do Moura, where Master Vitalino lived, who was a highlight in the production of handicrafts in Pernambuco and became the best known potter in the Northeast. His sculptures were and still are a success in Brazil and abroad.
Tracunhaém, located in the northern part of the state of Pernambuco, is known as the “ceramic centre” because most of the population is dedicated to the production of clay saints.
Among the main artisans of this region is Zezinho de Tracunhaém, who models his pieces representing St Anthony, St Peter, St Joseph, Father Cicero and others.
Goiana, the land of clay, located 50 kilometres from Recife, has as its main activity the modelling of clay images that recall patron saints of the Catholic Church (St. Peter, St. Anthony, St. Expeditus) and figures representative of the folklore of the Zona da Mata, such as the crab catcher, the pineapple seller, the coconut remover, the fisherman.
Also represented are the heroines of Tejucupapo, the rural maracatu, the pastoril, the washerwomen, the beggars, the charcoal burners and various other representations that express and enrich regional culture.
The artists who most excel in clay crafts are Zé do Carmo and Gercino Santos, both internationally known for their talent and creativity.
Art of Modelling Clay
Modelling has existed since the dawn of humanity. In ancient times, they moulded clay and transformed it into utilitarian and representative pieces.
Video Art of Modelling Clay in Tracunhaém.
Arte de Modelar o Barro ou Argila em Tracunhaém
Even in later civilisations modelling has always been present in vases, masks, decorative objects and much more.
So we can define modelling as the act of shaping, manually adjusting the shape of material such as clay, clay, and other malleable materials and transforming them into three-dimensional objects. Even with technologies it is still a very artisanal practice.
Unlike drawing and painting, modelling gives us a view of all the angles and sides of the structure and we can still perceive its texture.
Being a symbolic and playful form of expression, the act of manipulating clay becomes not only educational, but also a pleasurable form of expression and the three-dimensional becomes a new knowledge acquired through drawings.
Clay and modelling clay are the most commonly used by artists to make their work.
Even in ancient times, clay was widely used in the making of pots and figurines, in funerary urns and was always related to existence, to life.
The first artefacts modelled in clay were simple and some had geometric designs like those found in prehistoric times. Over time, techniques were improved, modelling was perfected and natural pigments or coloured clays were added to the piece.
The Greek civilisation is the most representative in the expansion of ceramic techniques. They made the firing and painting and classified the pieces by functionality. Artefacts and vases were decorated in red and black. The Greeks are regarded as the best pottery makers in the world.
With the prosperity of clay modelling, ceramics, other peoples began to develop other techniques, such as the Chinese, who started to fire them to make them stronger and to use kaolin (white powder) that made the piece translucent and light, porcelain.
Ceramics spread everywhere and gained new components, shapes and uses. What was once purely useful became decorative as well.
Other materials were also used in modelling, such as plaster.
In Brazil we have important ceramists like Master Vitalino, a simple man with great creativity. His pieces show the life of the inhabitants of the northeast in simple figures. For a better knowledge, visit the website:
The Paneleiras de Goiabeiras, cultural historical heritage by IPHAN, produce clay pots, a function inherited from their mothers and has as its origin the indigenous culture.
They have created a cooperative (everything is modernised), the Association of the Goiabeiras Potters, which generates income for the families who work there.
Modelling stimulates sensitivity and creativity through the artistic language experienced in the transformation of modelled matter. Very important and not only as a means of livelihood, but with significance for the educational practice of art teaching in school.
Clay is a generic designation in which a multitude of clay mixtures with the most varied species of impurities have been grouped.
The various minerals, metallic oxides and organic materials, associated with the clays in very different proportions, make the varieties of clays innumerable and present very different characteristics, both raw and after firing.
Note that in the same quarry you will often find very different types of clay depending on the depth at which you dig, for example.
Clays are rocks usually of sedimentary origin and come from the alteration of silicate rocks.
The minerals they contain are mainly kaolinite, illite or montmorillonite. From a chemical point of view, clays are hydrated aluminosilicates with very varied species of generic formula.
How to Model Clay
Clay is a material used since ancient times for the manufacture of objects of daily use and decoration.
Working with clay requires little more than your hands. Advanced techniques include a variety of tools such as the lathe or potter’s wheel which has a turntable to help mould a piece. With a little practice it is possible to make jugs, mugs, pots, vases, plates and bowls.
A. Moulding the clay with your hands

1. Prepare the clay
Good clay should be soft enough to be worked directly with your hands outside the packaging.
But you can achieve this effect by kneading the clay so that it becomes flexible and free of air bubbles or pellets. This process is called wedging.
- Place a lump of clay on a porous surface, such as concrete or canvas.
- Press the clay into the clay.
- Press the dough with the palm of one hand and push it forwards.
- Stretch and fold the clay as you bring it close to your body. It’s like kneading bread.
- Repeat the movements until the clay is uniform and consistent (more or less 50 times).

2. Use the classic method
Kneading the clay with your fingers is probably the oldest and most practical way to work with this material. When the clay is uniform, use your fingers to shape what you want. You can make a bowl, for example, with the help of this simple technique:
Separate a piece of clay and make a ball.
- Place it against the table where you are working and push it down slightly, but without letting it move out of place.
- Mould a small hole in it.
- Make a small hole in the centre of the ball. This will help open up the clay.
- Pull the clay out of the ball.
- Pull the clay sideways, in a horizontal direction and start to open the inside of the vessel.
- Grasp the sides of the clay and keep pulling upwards to make the bowl.
- Continue pressing and stretching until you get the shape and size you have imagined.

3. Try the coil technique.
Making objects by joining small rolls of clay is versatile and requires only your hands. Start by moulding a piece of clay.
- Split the clay into several small pieces of the same size.
- Mould small balls.
- Place your palms on the clay and make a rolling motion back and forth and produce the thin, long coils.
- Mould the clay into small balls.
- Continue the movement until they are long.
- Stop when you achieve the desired thickness. They can be thinner or thicker depending on what you are going to do (this will determine the thickness of the piece).
- Mould to your desired thickness.
- Mould it your way. To make a round bowl, for example, place the coils in a circle, pinch and flatten with your fingers.
Stack the “little snakes” on top of each other until they are in the correct shape. - Use the smaller ones to close the utensil (to mould the bottom, for example). It is possible to make a round plate and then stick it to the piece forming the base.
- Lightly press the coils to fix them and smooth the sides of the object.

4. Produce small slabs.
It is possible to produce objects of different shapes by joining flat “sheets” of clay. A good suggestion is to make a small terracotta box:
- With the help of a rolling pin or something similar open a piece of clay.
- Use a knife or sharp object to cut the small slabs. To make a box, cut the slabs into squares or rectangles of the same size.
- A good tip is to use an object as a guide. Place a square of paper on the clay and cut out the “leaves” with the knife using the mould as a base.
- After all the tiles are cut out, the box will be ready to be made.
- Once all the pieces have been cut out, make small cuts on the edges. This will help you to fuse one part to another when assembling the box.
- Attach one piece to the mould using a knife.
- Join one piece with the other. Carefully press your fingers or a small tool to join and smooth the edges.
- Repeat the action.
- Repeat the action until the parts of the box stick together.

5. Use an extruder.
This is a tool that can make “threads”, “hair”, “snakes” and cylinders of clay in a very practical way. Mini extruders can be bought in specialised ceramic shops or on the internet. Place a lump of clay inside the extruder.
Use the lever to push the clay and produce the desired shapes, such as circles or squares. This will produce coils or plates for moulding the ceramic.
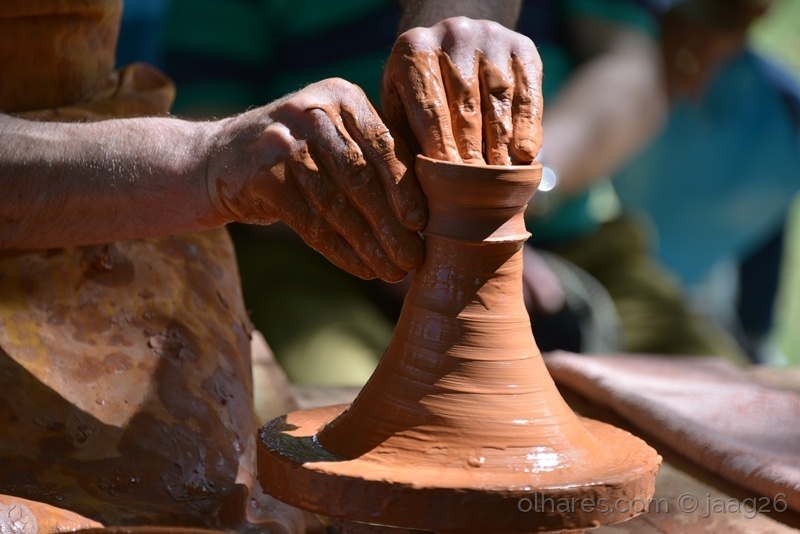
B. Using the potter’s wheel

1. Use the vice.
This tool can be manual or electric. Prepare the equipment before moulding the clay:
- Set the right direction of rotation (anti-clockwise if you use your right hand and clockwise if you are left-handed).
- Install the plate firmly on the base.
- Install the plate firmly on the base. This will help to reduce splashing and dropping of material during work.
- Adjust the height of the plate to the correct height.
- Adjust the height of the lathe to sit comfortably during moulding.
- Plug in the socket if the appliance is electric.
- Test the operation of the wheel to see if it is turning correctly before use.
2. Prepare the clay.
Knead it on a porous surface, push it with your fingers and pull it back. Repeat the process until it is pliable, consistent and uniform in appearance.

3. Place the clay on the potter’s wheel.
Make a ball of clay and place in the middle of the spinning base.

4. Centre the clay
With your hands still dry, touch the clay to make sure it is right in the middle of the wheel. Start moving the lathe very slowly and keep an eye on the material to keep it in the centre, without making it crooked.
5. Wet your hands.
Now that the clay is in the right place, it’s time to mould. It is important to keep your hands wet at all times while working on the lathe. Doing this makes the surface of the pottery smooth (very wet like a mud) and easier to mould. Leave a basin or pot of water to moisten them whenever you need to.

6. At the beginning, the workpiece is quite simple.
Start moving the lathe until you increase the speed. Place your hands around the clay and squeeze lightly as the base rotates. Then you will start to shape the object. With a little practice, you’ll be able to handle the clay and mould anything you want.
- To produce a tall utensil like a mug, push the material towards the centre. This will cause the clay to move upwards.
- To mould something a little wider like a bowl, press lightly on the clay so that it spreads out to the sides. Then mould it with your hands by pressing down until you get the right shape.

7. Open the clay.
Your fingers act as a tool. Place them in the middle of the ball of clay as you turn the lathe. Make a small hole, squeeze and pull with your fingers, your whole hand or a tool to get the opening the size you need to mould the utensil.
- To make mugs and jugs, which are taller, keep the inside of the piece relatively narrow.
- Widen the clay piece if you are making a plate or bowl, for example.

8. Mould the clay.
Go on moulding the clay and open it from the inside out with the help of your fingers. This will thin the “walls” of the piece. Keep working until you reach your goal.
To make jugs and mugs that have higher sides you will need to gently pull the clay upwards.

9. Take the clay off the lathe.
Wipe off any excess clay from the turntable. Then run a taut wire or spatula under the piece. This will separate the object from the base of the lathe. Carefully use a flat tool to remove and lay the piece flat to dry.
Mix types of clay to get a good consistency.
Pottery and art shops offer several options of modelling clay. You can experiment with mixing different types if you find that the clay is not working well on its own. One suggestion is to add thicker material if the clay is sticky, or malleable if the product is hard.
Tracunhaém is the “Capital of Ceramic Crafts”